San Diego College of Continuing Education (SDCE)
© 2020 Rob Spahitz / Spahitz Software
If so, click the "Next step" button. Otherwise read below.
Tips: ° The Student ID is a 10-digit number, usually starting with either 3 zeros or 3 fives, such as 5551234567.
° This may have been issued by us, or Miramar, Mesa or City College.
° For former students, the new number will be based on the former 6-digit or 7-digit number with leading zeroes added
° You can upgrade it by setting up a "mySDCCD" portal account (see below).
° If your number does not work, you will need to create a portal account.
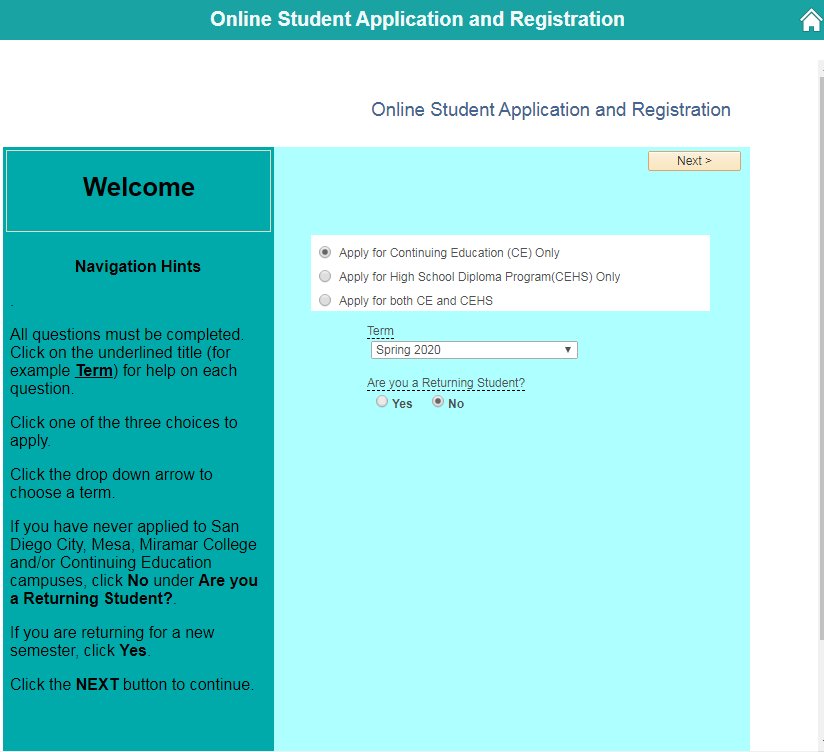
Need a Student ID? Apply thru: sdce.edu  and use "Apply for Continuing Education (CE) Only"
Tip: Use this if you've never gotten a student ID at SDCE or at Mesa, Miramar, or San Diego City College.
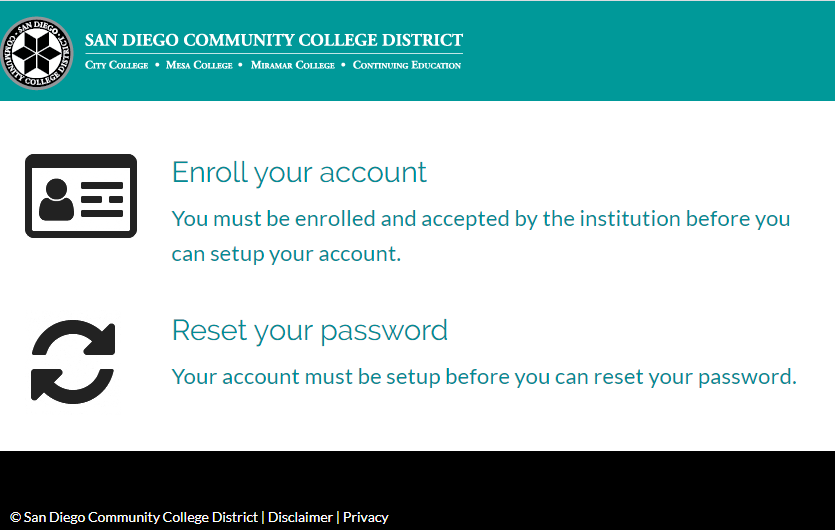
Need a "mySDCCD" portal account (older ID)? Set up at: sdpss.sdccd.edu
Tips: ° If you ever went to Mesa, Miramar or City college, or came to SDCE prior to 2019 you may need a "mySDCCD" portal account.
° Click on the “Enroll your Account” link, then follow directions to create a password and answer 5 security questions.
° Once this is set up, you can log into your portal using your 10-digit student ID and password.
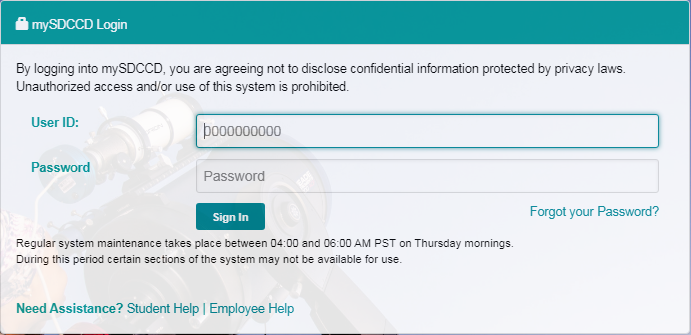
2. Log in to your mySDCCD portal
2a. This link: myportal.sdccd.edu
Tips: This will open in a new browser tab.
If you do not have this number available, check here sdpss.sdccd.edu to view in a new window
2b. Enter your 10-digit student ID and password then press the button on that page.
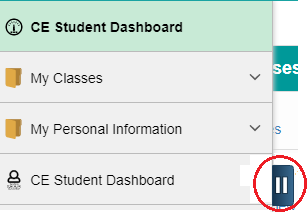
3. Open your CE Student Dashboard
3a. Click that button to open your Dashboard
Tip: You may also see other buttons, depending on where you've taken classes.
4. Start Enrollment
4a. Click the Continuing Education Classes tab at the top.
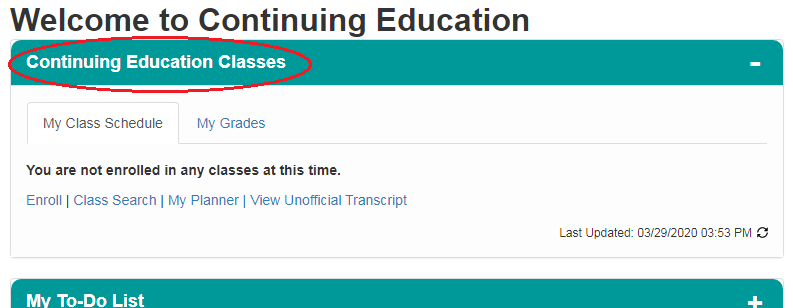
Tip: You may need to collapse the side bar by clicking the two white vertical bars button on the dark blue background.
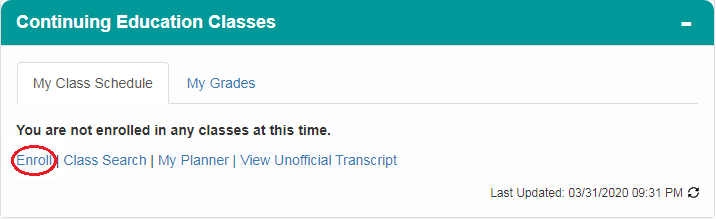
5. Enroll
5a. Click on the "Enroll" link in the "My Class Schedule" sub-tab.
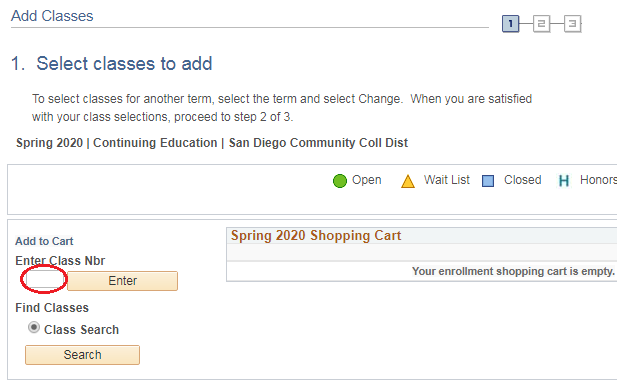
6. Enter the class number
Note: If multiple semesters are available, select a semester term then , then answer any questions that may appear and .
6a. Locate class number: ⇐ copyable
6b. Enter the 5-digit Class Number then click ...
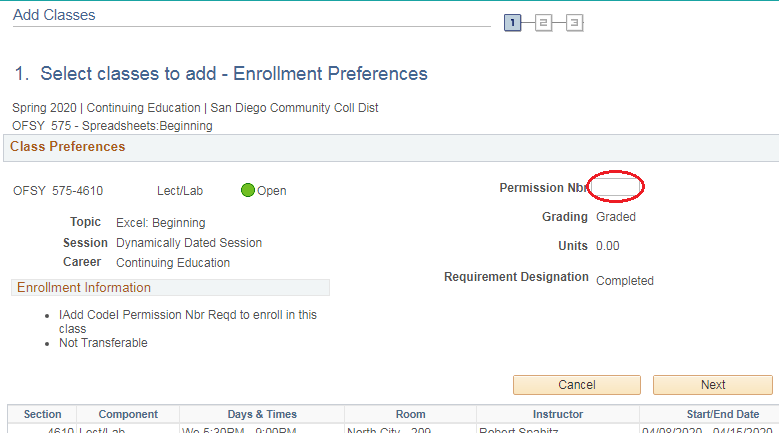
7. Enter permission number
7a. Get a 6-digit "Permission Nbr":
Class=Class was not selected in step 6!
Enter Student ID:
⇐ copyable
Tip: If permission number is unavailable, contact the instructor 📧.
7b. Enter the number on the registration page, then click
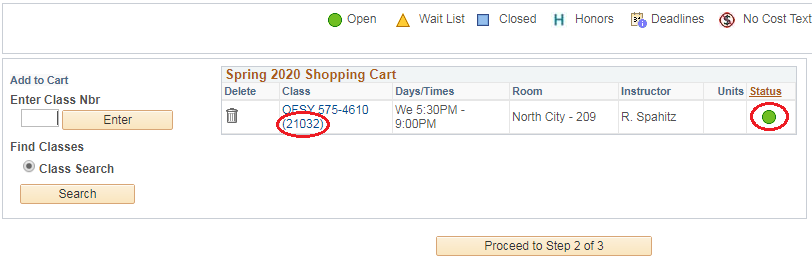
8. Confirm the Class in the Shopping Cart
8a. Check the listing and that the Status is Open (green circle), then click
Tip: To remove the class, click the corresponding trash can and repeat the previous step
9. Accept the Class
9a. Accept the class that appears; click
Tip: To remove the class, click the corresponding trash can and repeat the previous step.

10. Confirm successful enrollment
10a. Confirm that the Status column of the entry is a green checkmark for "Success: enrolled"
If you see the red "X" in the Status, backtrack and check your entries.
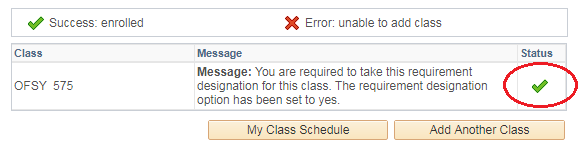
Congratulations! You are enrolled!
Errors?
- It asks me to input the "Class Number"
.. You are ready to be Enrolled! Please email your instructor and ask for the class number and permission number - I get an error saying I "Do not have Access"
.. Click on "CE - Apply" and submit all those answers to questions